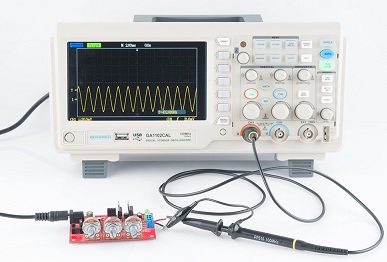
Oscilloscope Operating Precautions:
In addition to the general safety precautions, the following specific precautions should be observed when operating any type of oscilloscope. Most of the Oscilloscope Operating Precautions also apply to recorders.
- Always study the instruction manual of any oscilloscope with which you are not familiar even if you have had considerable experience with oscilloscopes.
- It is a good practice to go through the procedures each time the oscilloscope is used. This is especially true when the oscilloscope is used by other persons. The operator cannot be certain that position, focus and (especially) intensity control are at safe positions and the oscilloscope CRT could be damaged by switching on immediately.
- As for any cathode ray tube device (such as a TV receiver), the CRT spot should be kept moving on the screen. If the spot must remain in one position, keep the intensity control as low as possible.
- Always keep the minimum intensity necessary for good viewing.
- If possible, avoid using the oscilloscope in direct sunlight or in a brightly lighted room. This will permit a low intensity setting. If the oscilloscope must be used in bright light, use the viewing hood.
- Make all measurements in the centre area of the screen; even if the CRT is flat, there is a chance of reading errors caused by distortion at the edges.
- Use only shielded probes. Never allow your fingers to slip down to the metal probe tip when the probe is in contact with a hot circuit.
- Avoid operating an oscilloscope in a strong magnetic field. Such fields can causes distortion of the display. Most quality oscilloscopes are well shielded against magnetic interference. However, the face of the CRT is exposed and is subjected to magnetic interference.
- Most oscilloscopes and their probes have some maximum input voltage specified in the instruction manual. Do not exceed this maximum value. Also, do not exceed the maximum line voltage or use a different power frequency.
- Avoid operating the oscilloscope with the shield or case removed. Besides the danger of exposing high voltage circuits (several thousand volts are used on the CRT), there is the hazard of the CRTs imploding and scattering glass at high velocity.
- Avoid vibration and mechanical shock. Like most electronic equipment, an oscilloscope is a delicate instrument.
- If an internal fan or blower is used, make sure that it is operating. Keep ventilation air filters clean.
- Do not attempt repair of an oscilloscope unless you are a qualified instrument technician. If you must adjust any internal circuits, follow the instruction manual.
- Study the circuit under test before making any test connections. Try to match the capability of the oscilloscope to the circuit under test. For example, if the circuit has a range of measurements to be made (ac, dc, RF, pulse), you must use a wide-band DC oscilloscope, with a low capacitance probe and possibly a demodulator probe. Do not try to measure 3 MHz signals with a 100 kHz bandwidth oscilloscope. On the other hand, it is wasteful to use a dual trace 50 MHz laboratory oscilloscope to check out the audio sections of transistor radios.
Placing an Oscilloscope in Operation:
After the setup instruction of the oscilloscope manual have been digested, they can be compared with the following general or typical procedures.
- Set the power switch to Off.
- Set the internal recurrent sweep to OFF.
- Set the focus, gain, intensity and sync controls to their lowest position (usually fully counterclockwise).
- Set the sweep selector to External.
- Set the vertical and horizontal position controls to their approximate midpoint.
- Set the power switch to ON. It is assumed that the power cord has been connected.
- After a suitable warmup period (as recommended by the manual) adjust the intensity control until the trace spot appears on the screen. If a spot is not visible at any setting of the intensity control, the spot is probably off screen (unless the oscillsocope is defective). If necessary, use the vertical and horizontal position controls to bring the spot into view. Always use the longest setting of the intensity control needed to see the spot, so as to prevent burning of the oscilloscope screen. It should be noted that dc oscilloscopes need longer warmup times than ac oscilloscopes because of drift problems associated with dc amplifiers.
- Set the focus control for a sharp fine dot.
- Set the vertical and horizontal position controls to centre the spot on the screen.
- Set the sweep selector to Internal. This should be the linear internal sweep, if more than one internal sweep is available.
- Set the internal recurrent sweep to ON. Set the sweep frequency to any frequency, or a recurrent rate higher than 100 Hz.
- Adjust the horizontal gain control and check that the spot is expanded into a horizontal trace or line. The line length should be controllable by adjusting the horizontal gain control.
- Return the horizontal gain control to zero, set the internal recurrent sweep to OFF.
- Set the vertical gain control to its approximate midpoint, and touch the vertical input with you finger. The stray signal pickup should cause the spot to be deflected vertically into a trace of line. Check that the line length is controllable by adjustment of the vertical gain control.
- Return the vertical gain control to zero (or its lowest setting).
- Set the internal recurrent sweep to ON. Advance the horizontal gain control to expand the spot into a horizontal line.
- If required, connect a probe to the vertical input.
- The oscilloscope should now be ready for immediate use. Depending on the test to be performed the oscilloscope may require calibration.
